Contact Sensor Placement Tips For Reliable Alerts
Installing contact sensors effectively can significantly enhance your ability to receive timely alerts about potential issues, such as water leaks. This guide will help you understand how to place sensors for maximum reliability and efficiency. Remember to handle all equipment carefully and ensure that the sensors are installed according to your safety guidelines.
Disclosure: As an Amazon Associate I earn from qualifying purchases at no cost for you.
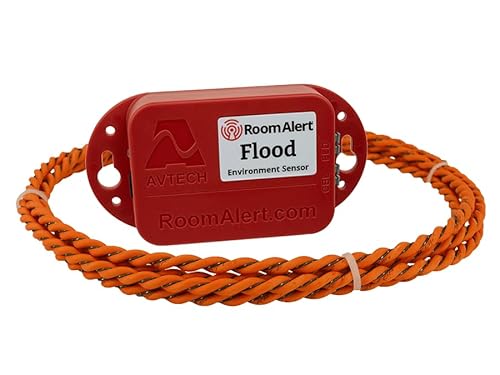
- Easy ‘Plug & Play’ setup for immediate use with Room Alert environment monitors.
- Real-time recognition: Water/Flood along 8' cable length.
- Power supply: 5VDC 1A Adapter (included).
What You’ll Need
- Contact sensors (e.g., Room Alert Flood Sensor)
- Power supply (if applicable)
- Mounting hardware (if not included)
- Measuring tape
- Level tool
- Smartphone or computer for monitoring alerts
Step-by-Step
- Identify Critical Areas: Determine the areas that are most susceptible to water leaks, such as basements, kitchens, and around appliances like washing machines and water heaters.
- Measure Optimal Height: Using a measuring tape, measure the height at which the sensor will be installed. Typically, sensors should be placed close to the floor to detect leaks early.
- Choose the Right Sensor Cable Length: If using the Room Alert Flood Sensor, consider the length of the cable included. Ensure it is long enough to reach from the sensor to the area of concern without being stretched.
- Secure the Sensor: Use the included mounting hardware or adhesive to securely attach the sensor to the wall or floor. Ensure it is stable and won’t be easily dislodged.
- Connect the Power Supply: If your sensor requires a power supply, connect it according to the manufacturer’s instructions. Ensure that the power source is reliable and protected from potential water exposure.
- Test the Sensor: After installation, test the sensor by simulating a leak (e.g., pouring a small amount of water near it) to ensure it activates and sends an alert.
- Set Up Monitoring: Connect the sensor to your monitoring system, whether it’s a dedicated app or a web interface, to receive real-time alerts.
- Document the Installation: Take notes on the installation process, including sensor locations and any specific configurations for future reference or maintenance.
Pro Tips for Better Results

- Easy ‘Plug & Play’ setup for immediate use with Room Alert environment monitors.
- Real-time recognition: Water/Flood along 8' cable length.
- Power supply: 5VDC 1A Adapter (included).
- Consider placing multiple sensors in areas with a higher risk of leaks for comprehensive coverage.
- Regularly test the sensors to ensure they are functioning properly and are not obstructed.
- Keep a log of alerts to identify patterns or recurring issues that may require further investigation.
Common Mistakes
- Installing sensors too high, where they may miss leaks that start at ground level.
- Neglecting to test the sensors after installation, leading to false confidence in their reliability.
- Overlooking areas that may also be vulnerable, such as behind appliances or in closets.
Troubleshooting
- If the sensor does not activate, check the power supply and connections.
- Ensure the sensor is not blocked by furniture or other objects that may prevent it from detecting moisture.
- Check for software or connectivity issues if alerts are not being received on your monitoring device.
Maintenance / Next-Time Checklist
- Inspect the sensors every few months to ensure they are clean and unobstructed.
- Test the sensors periodically to confirm they are still functioning as intended.
- Update your monitoring software if applicable, to ensure compatibility and access to new features.
Recommended Products & Tools
- Room Alert Flood Sensor: Ideal for detecting water leaks with real-time alerts, helping prevent significant damage.
- Measuring Tape: Essential for ensuring accurate placement of sensors at the right height.
- Level Tool: Useful for ensuring the sensor is installed straight, which can affect its performance.
FAQ
- Q: Can I use contact sensors outdoors?
A: Most contact sensors are designed for indoor use. Check the specifications to confirm if they are suitable for outdoor installation. - Q: How often should I test my sensors?
A: It is recommended to test your sensors every few months to ensure they are functioning correctly. - Q: What should I do if I receive a false alert?
A: Investigate the area for any moisture or water sources and ensure the sensor is clean and unobstructed. - Q: Can I extend the sensor cable length?
A: Yes, some sensors allow for extension cables, but ensure compatibility with your specific model. - Q: How do I connect my sensor to a monitoring system?
A: Follow the manufacturer’s instructions for connecting the sensor to your monitoring device, usually through a simple setup process.
- Easy ‘Plug & Play’ setup for immediate use with Room Alert environment monitors.
- Real-time recognition: Water/Flood along 24' cable length.
- Power supply: 5VDC 1A Adapter (included).
Wrap-Up
Proper placement of contact sensors is crucial for receiving reliable alerts about potential water leaks. By following the steps outlined in this guide, you can ensure that your sensors are positioned effectively and maintained for optimal performance. Regular testing and monitoring will further enhance your ability to protect your space from water damage.
Recommended Products & Tools
- Easy ‘Plug & Play’ setup for immediate use with Room Alert environment monitors.
- Real-time recognition: Water/Flood along 8' cable length.
- Power supply: 5VDC 1A Adapter (included).
- Easy ‘Plug & Play’ setup for immediate use with Room Alert environment monitors.
- Real-time recognition: Water/Flood along 24' cable length.
- Power supply: 5VDC 1A Adapter (included).

